
The Monstera – better known as the “Swiss Cheese Plant” is one of the most popular tropical houseplants today. Its signature ribbed leaves, called fenestrations, form beautiful outlines when the plant is healthy and getting plenty of light. Under the right conditions, these vining plants can grow very quickly. While the Monstera doesn’t mind being kept in a small container, owners may find themselves having to repot their Monstera vine within 1-2 years of purchasing it. If you are curious about how to repot a Monstera plant and encourage long-term growth, this guide is for you.
What is a Monstera plant?
The Monstera family represents several vining tropical plants known for their signature big, beautiful leaves. These plants are easy to care for and propagate, making them incredibly popular with plant enthusiasts old and new.
The most common plant in the Monstera family is the Monstera Deliciosa. Directly translated, its name means “delicious monster” for it’s delicious fruit that mature plants produce, as well as its monster-like leaves that can quickly span several feet in size. The Monstera Deliciosa produces solid, dark green foliage on a vine anchored by arial roots to help anchor the plant as it tries to grow upwards.
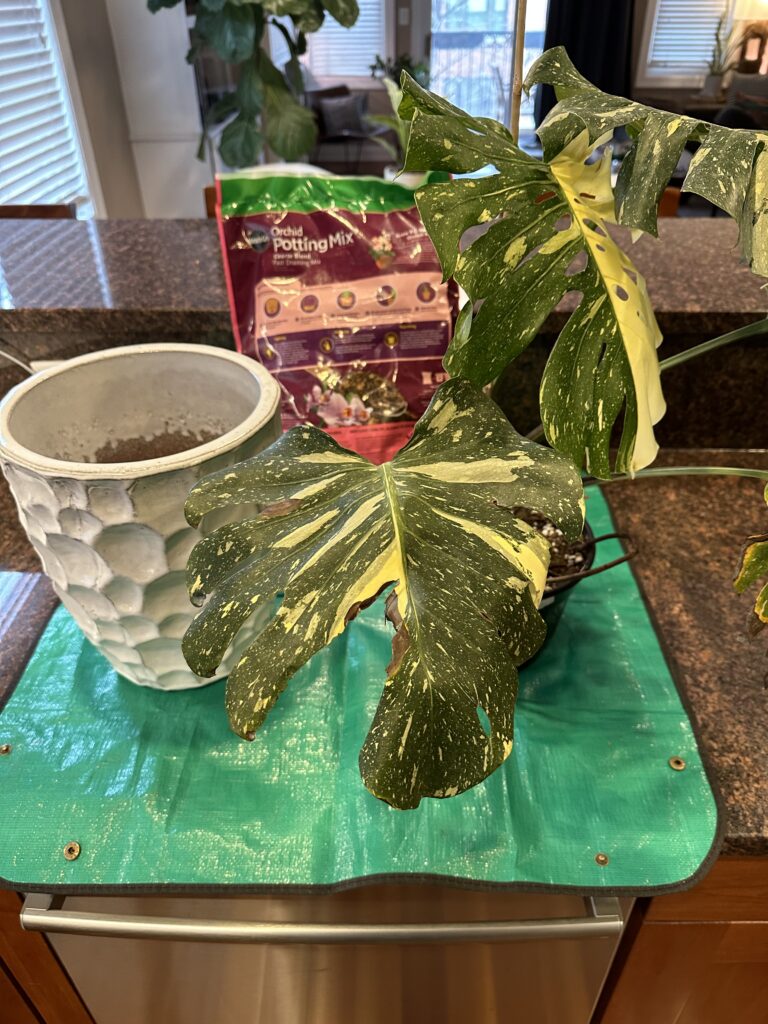
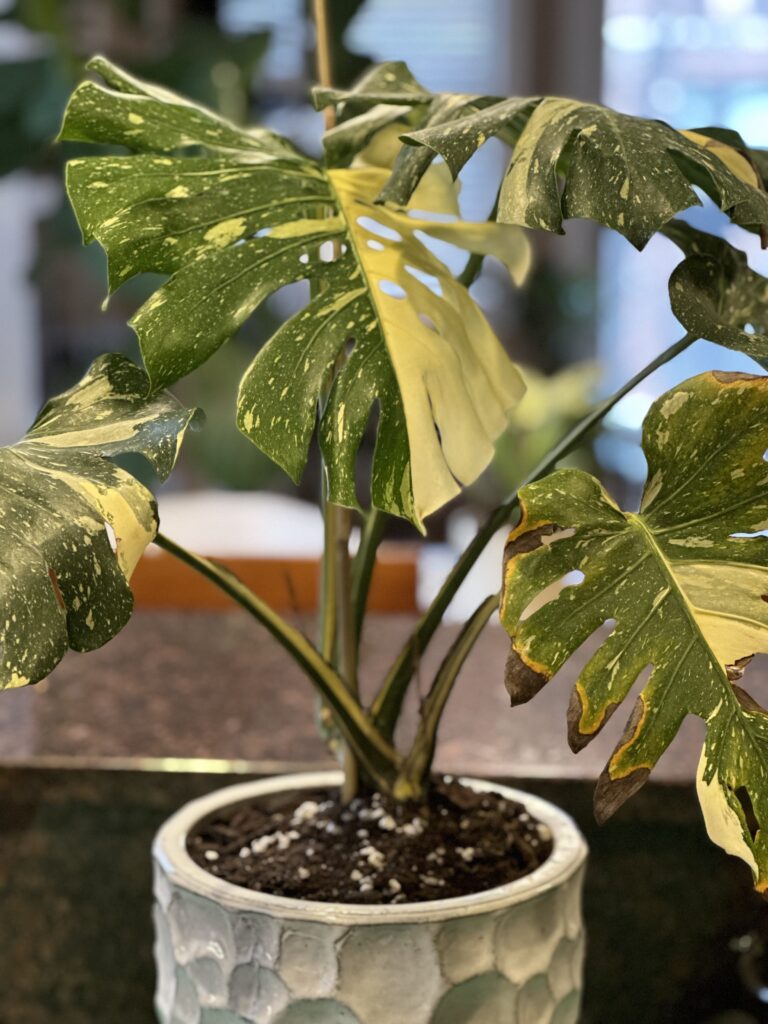
Other variations of the Monstera include the rarer Thai Constellation Monstera as well as the Monstera Albo – both of which are harder to find. These plants have signature creamy variegation patterns which many people find beautiful.
Why Repot a Monstera Plant
There are a few reasons houseplants may need repotting, and Monsteras are no exception. While these plants don’t need as much container space as other tropicals, eventually root crowding can lead to decline or stunted growth. In order to keep your plant happy, it isn’t a good idea to check to see if it needs to be repotted due to new growth, usually once every 1-2 years.
More mature plants in larger containers can also usually stay happy in their current pots for years longer as they reach maturity. Knowing why to repot a Monstera is just as important as knowing how to repot a Monstera plant.
Signs its Time to Repot a Monstera Plant
Root crowding is the number one sign that it’s time to repot your Monstera into a new pot. If you notice root clusters coming out of the drainage holes of your current pot, this is a sign that your plant is out of room to grow inside the container. If you notice this, gently try to remove the plant by lifting up near the plant’s base. If you notice strong roots circling the circumference of the pot, it definitely needs more room to grow and should be repotted immediately.
Soil quality is another leading factor to repotting your Monstera. These plants love a mix of succulent and orchid soils. Others have had success growing them completely in LECA balls to avoid any issues with soil pests. While this is possible, a 50/50 mix of succulent soil and orchid medium has worked well for us. Over time, your plant will tap all of the nutrients from the soil. Replacing this with fresh soil will ensure it can continue growing, along with regular fertilizing during the growing months of spring and summer.
Finally, it may be time to repot your Monstera if you’ve recently brought one home from your nursery and it’s outgrowing its plastic container you purchased it in. While these containers are great for the first few weeks of your plant’s new life, finding a more permanent container a few inches wider will be a great first step to helping your plant establish itself.
How to Repot a Monstera
1. Pick the Right Container
The first, and most obvious step is to get a container that will be the new home for your plant. We recommend only going one size up – meaning that the new pot’s diameter is only a few inches larger than the current pot – to help your plant acclimate.
Monsteras are really easy-going plants, so they can thrive in a variety of container types. So your plant will be happy whether you decide on a plastic, terracotta or glazed pot to go with. Whichever contain you choose, make sure it has drainage holes as Monstera roots need to be dry between waterings.
Not sure which pot to pick? Our guide on pots and containers walks through the pros and cons of popular pots on sale today.
2. Prepare Your New Pot
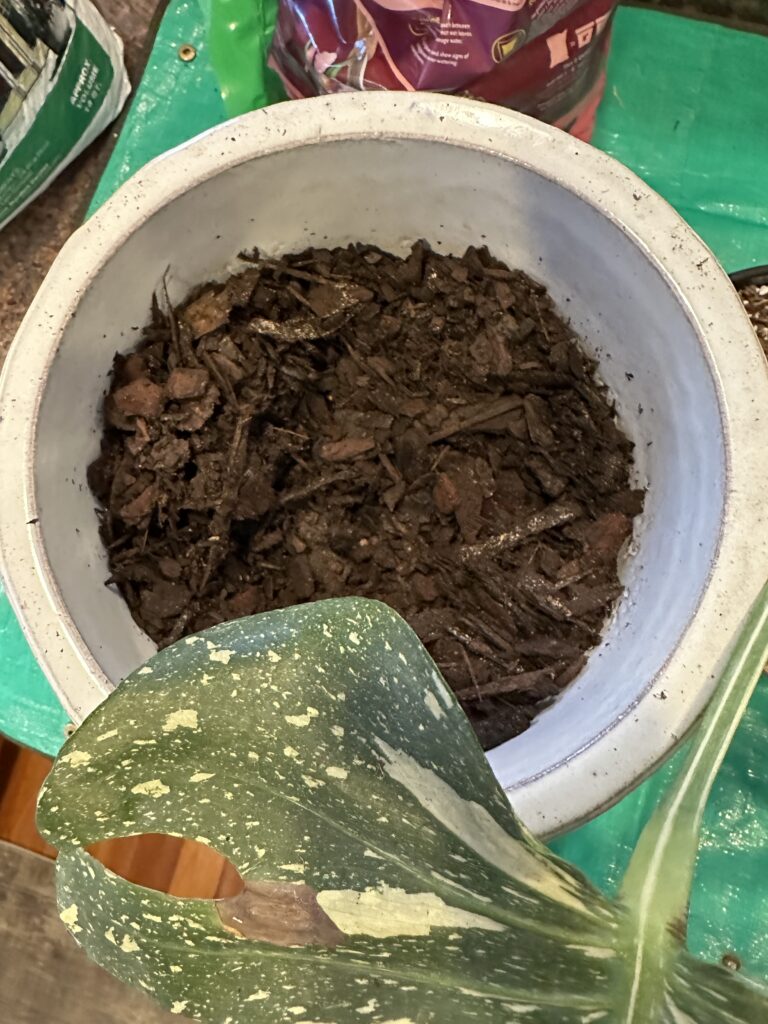
Place your pot on a large working surface. If you have a plant mat, we recommend using it to collect any spilled soil that you can later use while also avoiding making a mess. Fill the new pot about halfway with your cactus and orchid mix.
Note – despite the common belief, there’s no real benefit to adding gravel or rocks at the bottom of your pot since water will still creep into the soil. This is why it’s important to make sure your container has a drainage hole.
3. Prepare Your Plant
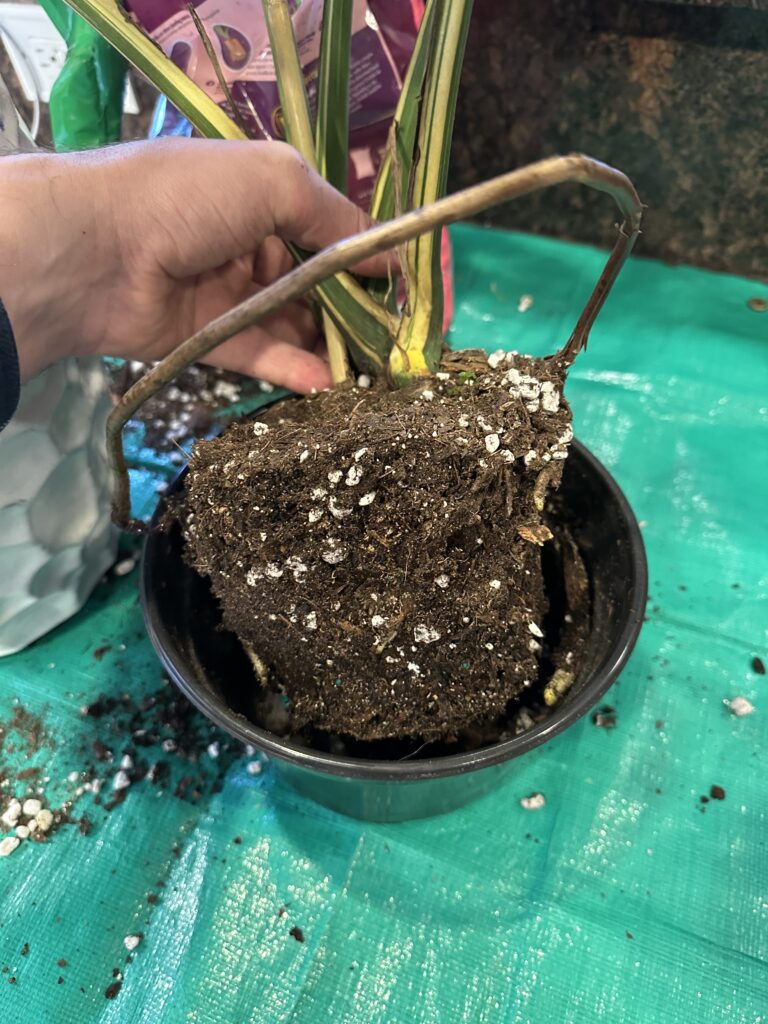
Gently remove your plant from its current container. If it’s in a plastic grow pot, you may carefully squeeze the pot to help free the roots.
Keep as many of the root mass as possible, but if small segments get removed, your plant will be fine. If older soil is wrapped around the roots, this is okay as you should transfer some current soil into the new container to help your plant adjust to its new home.
4. Making the Move
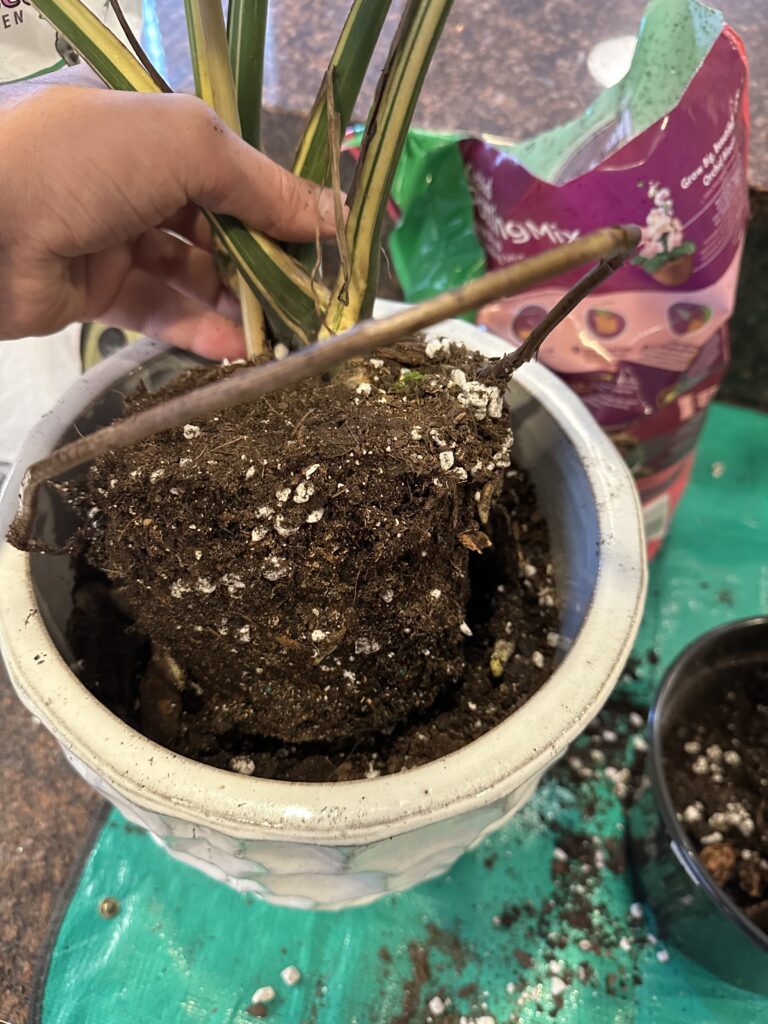
If you are using a moss pole, grow stake or trellis to help the vine grow upwards, place it in the pot before the roots to avoid damaging the Monstera. Slowly fill in soil around the plant.
Position the plant in the new container, keeping the main vine with its newest leaves in the center. Mix in existing soil with your new cactus and orchid mix around the sides of the plant, firmly pushing down the soil to remove any air pockets.
You can also choose to bury any long arial roots, or cut them from the plant during this time. Burying them will help support your plant, and removing them won’t do any damage.
Firmly press around your plant until the soil level is slightly below the lip of the pot. This will make sure any extra water doesn’t spill over the sides when soaking your plant. Once the soil level looks uniform, and your plant and stake feel securely in place, it’s time to wrap up.
5. Plant Cleanup and Watering
With everything feeling secure, move your plant to a sink or tub. Using a spray bottle, mist the leaves, continuing through the stems and down to the node. This will wash away any loose soil that may have gotten onto the leaves during repotting. You can also give your container a quick rinse as dirt likely made its way onto the lip and exterior sides of your pot.
When you’re done cleaning, it’s time to give your plant its first big watering. This works best for new containers that have proper drainage holes to allow all excess water to drain away from the plant. If this sounds like your container, keep the plant in the sink and use a watering can to vigorously water the plant, until water begins to drain from the bottom. This will ensure water has made its way through all of the dry soil, and will help strengthen the roots.
If your new container does not have a drainage hole, you can still water your plant, but you must be careful to not provide too much water since Monstera roots are prone to rotting in containers without proper drainage holes.
Wrapping Up
That’s about it when it comes to how to repot a Monstera. With the plant in its new container and watered for the first time, you can safely move the plant back to its original spot once water stops dripping from the bottom – or when you have a saucer in place to catch excess water. Remember that Monstera plants love bright indirect light, prefer to stay a little on the dry side, and thrive in high humidity.
For more about Monsteras, read up on what makes Thai Constellation Monsteras so expensive and hard to come by.