
Plants are so easy to fall in love with, especially when they look perfect at the nursery. But even the most meticulously cared-for plants can experience a decline for any number of reasons. Armed with knowledge of preventative plant care, you can rescue a dying houseplant and restore it to its former glory. In this all-encompassing guide (one of our longest!), we’ll dive into the myriad reasons behind a plant’s decline and equip you with practical steps to rescue your plants and prevent decline in the first place!
Decoding the Dilemma
The first step to rescue a dying houseplant is to understand what’s wrong in the first place. So many factors can contribute to a plant’s deterioration, ranging from excessive or insufficient watering, lackluster lighting, pesky pests, nutrient deficiencies, to even the clutches of diseases. Solving the mystery starts with identifying if any conditions have recently changed, or if something in your environment is radically different from the nursery if you’ve recently brought home a plant that’s starting to decline. Below, we’ll look at individual care factors and see how they can play a role to rescue your dying houseplant.
Water Works Wonder
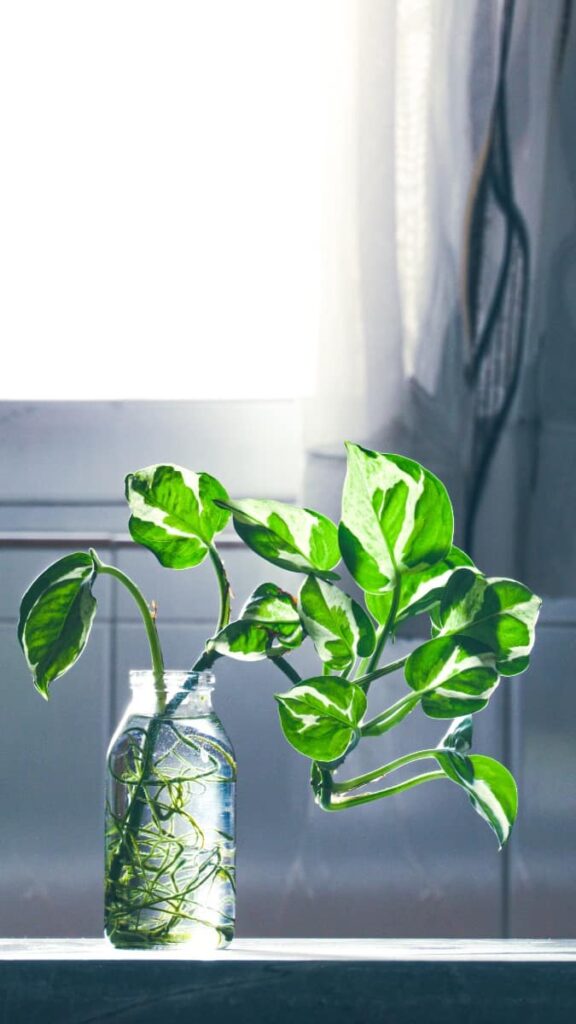
Proper watering is the lifeblood of plant care, and improper hydration often serves as the chief culprit behind a plant’s downfall – and the biggest factor in turning around the decline to rescue a dying houseplant. Before embarking on the resurrection of your fading houseplant, it’s imperative to assess its hydration needs. Gauge the moisture level of the soil by plunging your finger about an inch deep into the earth. If it feels parched, it’s time to quench its thirst. However, if the soil feels perpetually drenched or waterlogged, overwatering may be the villain. Adjust your watering schedule judiciously, ensuring your plant receives just the right amount of moisture without drowning its delicate roots.
Too much water can invite unwanted pests and root rot, while not enough water can cause your plant to dry out with crispy brown leaves. Watering frequency is also just one part of the puzzle. Do you notice your soil holding onto excess water? Does your pot or container contain proper drainage? Even the perfect watering schedule will be of no use if your plant can’t escape from standing water – one of the biggest factors that lead to decline.
🌿 Quick Tip: If your planter lacks drainage, consider growing your plant in a simple plastic container with drainage, and setting this pot inside of your decorative container, letting you easily remove it for weekly waterings. This helps you get the best of both worlds!
Shedding Light on Proper Lighting Conditions

In addition to water, light plays one of the biggest roles in a plant’s health. Not enough light can pave the way for feeble growth and eventual decline. Most indoor plants thrive in the embrace of bright, indirect light. The telltale signs your plant isn’t getting enough light include stringy new growth with smaller leaves, or leaves that appear more yellow or otherwise weak.
The best way to combat weak lighting is to move your plant to a sunnier location, or leverage the aid of an inexpensive LED plant light. I’m a fan of plant lights due to their low-cost, and ability to set them on a timer, making for a zero-effort way to provide beneficial light, even if your room would not naturally support plant-friendly lighting naturally.
On the other hand, if your plant is basking in the harsh glare of direct sunlight and displaying signs of sunburn, you should move your plant to a shaded area outdoors – or bring it back inside as soon as possible to rescue a dying houseplant due to intense sun exposure. Unfortunately, many people don’t realize that many houseplants get as much damage as people in direct sunlight… especially for hours (or days) of constant exposure.
The bad news is that if you had this happen and notice brown, crunchy leaves, this growth is completely dead and unfortunately will not rebound. However, if caught in time, cutting off this growth and allowing your plant to recover in a shadier spot will likely help it rebound. During this time, make sure you provide plenty of water since extreme sun exposure likely dried out your plant completely. With any luck, you’ll notice that you were able to successfully rescue your dying houseplant after a few weeks of proper care.
Conquering the Pests and Plagues
Pests and diseases, the nefarious foes of houseplants, can wreak havoc on their well-being. Conduct a thorough inspection of your plant, on the lookout for telltale signs of infestation such as spider mites, fungus gnats, root rot or other plant pests. If any of these pests have infiltrated your green haven, unleash the power of appropriate organic or chemical insecticides, meticulously adhering to the instructions.
To keep your plant healthy in the future, we strongly recommend the use of Neem Oil as a natural pest protection. This is readily available in pre-mixed spray bottles, but it’s just as easy to buy small concentrated packets that you can mix with water at home.
As for diseases, ruthlessly eliminate any afflicted leaves or stems, and consider employing a fungicide if the situation demands it. Quarantining the plant from its healthy counterparts during treatment can effectively halt the spread of pests or diseases. By acting early, you can take the steps needed to rescue your dying plant and adding Neem Oil into your care routine will guarantee your plants are protected from pests in the future.
Nourishing Nutrients
Nutrient deficiencies can sap a plant’s vitality and render it more susceptible to decline. Bestow your fading houseplant with a nutrient-rich elixir by fertilizing it with a well-balanced, water-soluble fertilizer. Adhere to the recommended dosage and frequency specified on the fertilizer packaging, for an overdose of nutrients can prove detrimental.
Additionally, ensure your plant is nestled in soil brimming with nourishment or contemplate repotting it with fresh soil to replenish its nutrient reservoir. Nutrients are a great way to keep your plant vibrant during the dormant winter months, but they are especially helpful during the spring and summer growing seasons to encourage fast new growth. While helpful with rescuing dying houseplants, seasoned growers use nutrient mixes to encourage an explosion of new growth.
When paired with indoor lighting, humidity, and proper watering, nutrients can help your plant continue to blossom indoors during the winter, prolonging the ever-important growing season for several more months of growth.
Pruning and Tender Loving Care
Pruning serves as a rejuvenating tonic for a dying houseplant, as it eradicates lifeless or diseased parts and stimulates fresh growth. Snip away any yellowed, wilted, or damaged leaves, stems, or branches with the precision of clean, sharp pruning shears. Furthermore, shower your plant with tender loving care by gently wiping its leaves with a damp cloth, banishing the dust that hampers its ability to bask in the glory of light.
When it comes to the daunting task of rescuing a houseplant on the brink of death, the very first step is to meticulously identify the underlying problem. This crucial step is absolutely vital in order to implement the appropriate solution and save your precious plant. Brace yourself, for here are some common signs of a houseplant in distress and the potential causes that may be lurking in the shadows:
1. Oh, the agony of wilting or drooping leaves! If you’ve ever had a Fiddle Leaf Fig, you might have experienced dropped leaves as these trees are especially finicky and picky about their indoor conditions. This distressing sight could be an indication of either a parched plant in desperate need of water or a drowning victim suffering from excessive watering. To unravel this mystery, delve deep into the soil by sticking your finger about an inch down. If the soil feels as dry as the Sahara, it’s time to quench your plant’s thirst. However, if the soil feels like a soggy swamp, your plant is most likely drowning in overwatering misery. A good rule of thumb to follow: yellowing leaves tend to result from overwatering while crispy brown leaves are a result of underwatering your plant.
2. It could be a consequence of overwatering, underwatering, nutrient deficiencies, or even a sneaky pest invasion. To solve this, examine your plant closely for any signs of uninvited guests, such as aphids or spider mites. If these pesky intruders are absent, then it’s time to address any nutrient deficiencies by providing your plant with a well-balanced fertilizer specially designed for houseplants.
3. Notice any brown or black spots on leaves? These ominous spots often serve as a warning sign of a fungal or bacterial infection lurking in the shadows. The culprits behind these infections could be overwatering, poor air circulation, or excessively high humidity levels. To prevent the spread of this sinister infection, swiftly remove any affected leaves and relocate your plant to an area with ample air circulation.
4. Alas, the tragedy of stunted growth! If your plant seems to be stuck in a rut with no new leaves or growth, it may be due to insufficient light or a lack of essential nutrients. Embark on a quest to evaluate your plant’s current location and ensure it is basking in the appropriate amount of light tailored to its specific needs. Additionally, consider nourishing your plant with a slow-release or liquid fertilizer to provide the much-needed nutrients for growth.
5. Aphids, mealybugs, and spider mites are the notorious culprits that can wreak havoc on your green companions. Keep a keen eye out for any signs of these tiny terrors, such as minuscule insects, intricate webbing, or sticky residue on leaves. Swiftly combat this infestation by employing the powers of organic insecticidal soap or neem oil, following the instructions with utmost precision.
There may be other mysterious issues that are unique to your specific plant species. By skillfully identifying the problem at hand, you will be equipped with the necessary knowledge to embark on a heroic journey of rescuing your dying houseplant and restoring it to its former glory.
Assessing the Plant’s Condition: Identifying the Issue to Rescue a Dying Houseplant
To rescue a dying houseplant, the first step is to assess its condition and identify the root cause of its decline. It’s a complex process that requires a deep understanding of the plant’s distress signals.
Watering Issues
Ah, the enigma of watering! It’s a delicate balance that can make or break a plant’s well-being. Improper watering is a common culprit behind a plant’s decline. Overwatering can drown the roots, leading to the dreaded root rot. On the other hand, underwatering can leave the plant dehydrated and wilting. It’s a burst of complexity that requires careful observation. To solve this puzzle, insert your finger about an inch deep into the soil. If it feels dry, the plant may be gasping for water. But if it feels excessively wet, it could be drowning in a watery abyss.
Light Requirements
The dance of light and plants is a mesmerizing spectacle. But too little or too much light can throw the plant’s health off balance. Inadequate light can stunt growth, leaving the plant weak and its leaves pale. On the other hand, excessive exposure to direct sunlight can scorch the leaves, turning them into a yellowing canvas. It’s a burst of contrasting effects that requires a keen eye to decipher. Similarly, inadequate humidity levels can leave the plant’s foliage dry and damaged. It’s a burst of environmental factors that demand careful consideration. Find the sweet spot of temperature and humidity for your plant’s species, and watch it thrive.
Nutrient Deficiencies
Ah, the hunger games of plants! Nutrients are the lifeblood that fuels their growth and vitality. But a lack of essential nutrients can lead to a burst of yellowing leaves, stunted growth, and overall weakness. Assessing these needs and providing a balanced fertilizer is the key.
Pests and Diseases
Ah, the battle against invaders! Insects, mites, and diseases can launch a full-scale assault on houseplants, leaving them defenseless and in decline. They leave behind webs, chewed leaves, sticky residue, spots, discoloration, and wilting. Identifying and treating these issues promptly is crucial to saving your plant from their clutches. Address the watering puzzle, shed light on its light requirements, maintain the perfect temperature and humidity dance, nourish it with the right nutrients, and fend off the invaders. With patience, care, and the right interventions, you can give your houseplant a fighting chance at recovery.
Providing Proper Watering Techniques: The Key to Rescue a Dying Plant from Over or Under Watering
Improper watering is the number one reason plants start to decline. Whether it be overwatering or underwatering, finding balance in plant hydration is absolutely vital for the survival and eventual rescue of a dying houseplant.
It should be no surprise that each plant has its own unique water requirements. A cactus and a lush tropical fern have very different water needs. Caring for them both with the same amount of water will likely cause one, if not both, plants to decline. Research the natural habitat and water needs will go a long way to keeping your plants healthy. Does it yearn for moist soil, or does it thrive in the arid embrace of drier conditions? Armed with this wisdom, you shall be equipped to provide the perfect amount of water, tailored to your plant’s desires. Knowing what your plants expect in terms of water may make the difference to rescue a dying houseplant.
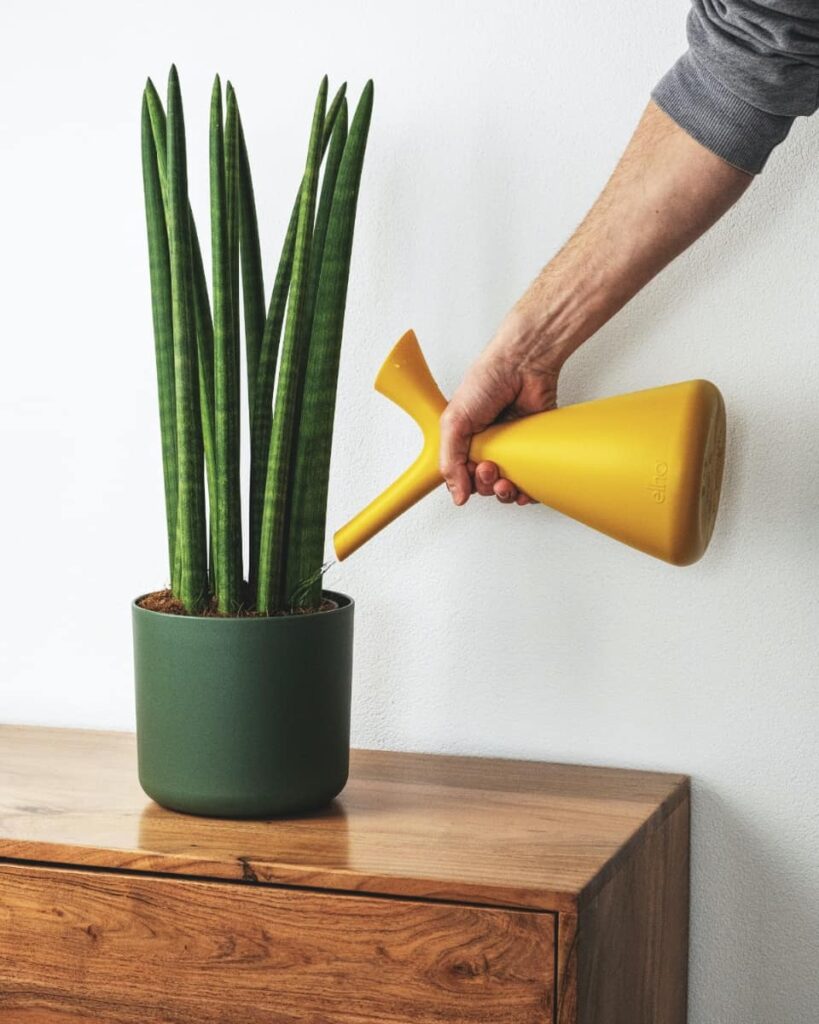
In terms of watering, it may surprise you that your technique is just as important as the schedule that you provide water. When watering, your plant should be in a container with more than enough drainage at the bottom, letting excess water run through. With this setup, water very well, either outdoors or over a sink so you don’t make a mess. A thorough watering will not only let your plant collect needed moisture, it will encourage strong root growth to support the future growth of your plant. Proper drainage, and regular waterings will not only rescue a dying houseplant, but this regular cadence will ensure long-term plant health. Just be sure to pay attention to your specific plant’s watering needs.
🌿 Quick Tip: Need to know how much water your plant needs? Browse our 500+ care guides using the search feature in the right side panel!
By mastering the art of proper watering techniques, you shall significantly increase your odds to rescue a dying houseplant. Keep a watchful eye on your plant’s overall health, adjust your watering routine accordingly, and soon you shall witness the glorious signs of life returning to your once-dying houseplant.
Adjusting Lighting Conditions: Finding the Right Balance
Rescuing a dying houseplant requires a delicate dance with light. Like water, proper lighting holds the power to healthy plant growth. Achieving the perfect balance is the key to rescuing your plant from the brink of demise.
Dive into the lighting conditions
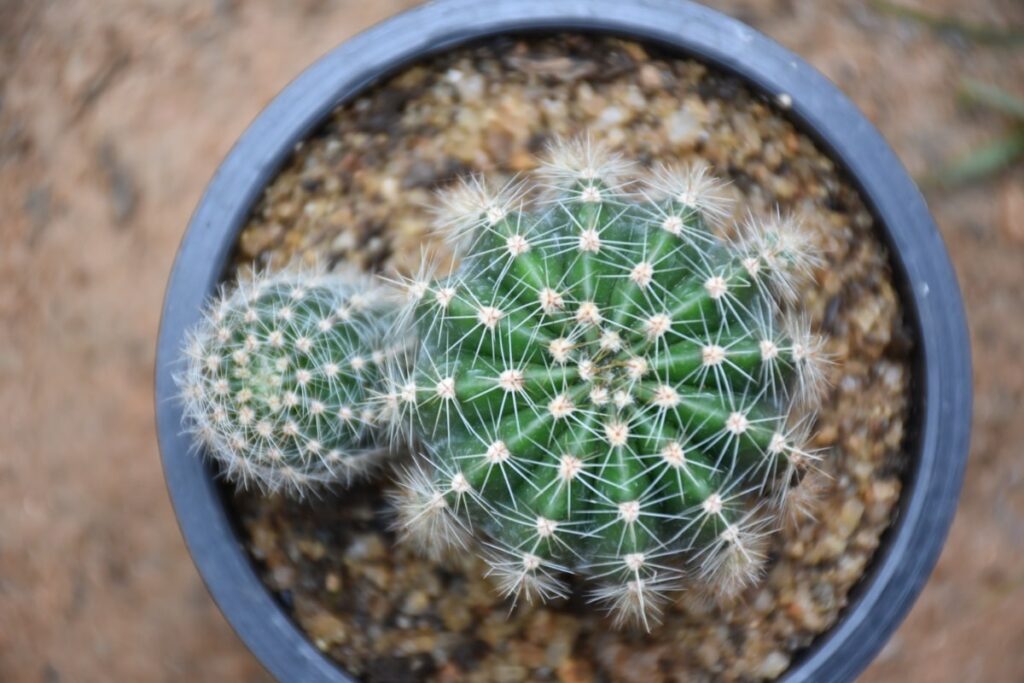
Like water, different plants require different lighting conditions. Cacti and succulents like aloe vera love as much sun as they can get – thanks to their natural desert environments where they spend seasons with high heat, direct sun, and little humidity. On the other extreme, lush tropicals like heart ferns thrive in low-light conditions, more akin to their natural rainforest habitats.
In fact, there are many plants that thrive in low-light conditions, and many people with less-than-ideal light can still have a home full of plants made for this kind of environment. Matching your home’s lighting to the right plants will not just help you rescue a dying plant that experienced poor lighting, it will help you choose houseplants that will absolutely thrive in your home.
Shuffle the plant’s location
Like real estate, one of the most important decisions you can make for your plant is location, location, location! If you move your plant, and it’s getting too much sun in its new spot, move it to a shady spot where indirect sunlight or dappled shade can shower it with love. Conversely, if your plant is struggling in a dimly lit corner, looking weak and pale, move it to a brighter spot where indirect sunlight can work its magic.
Illuminate with artificial light
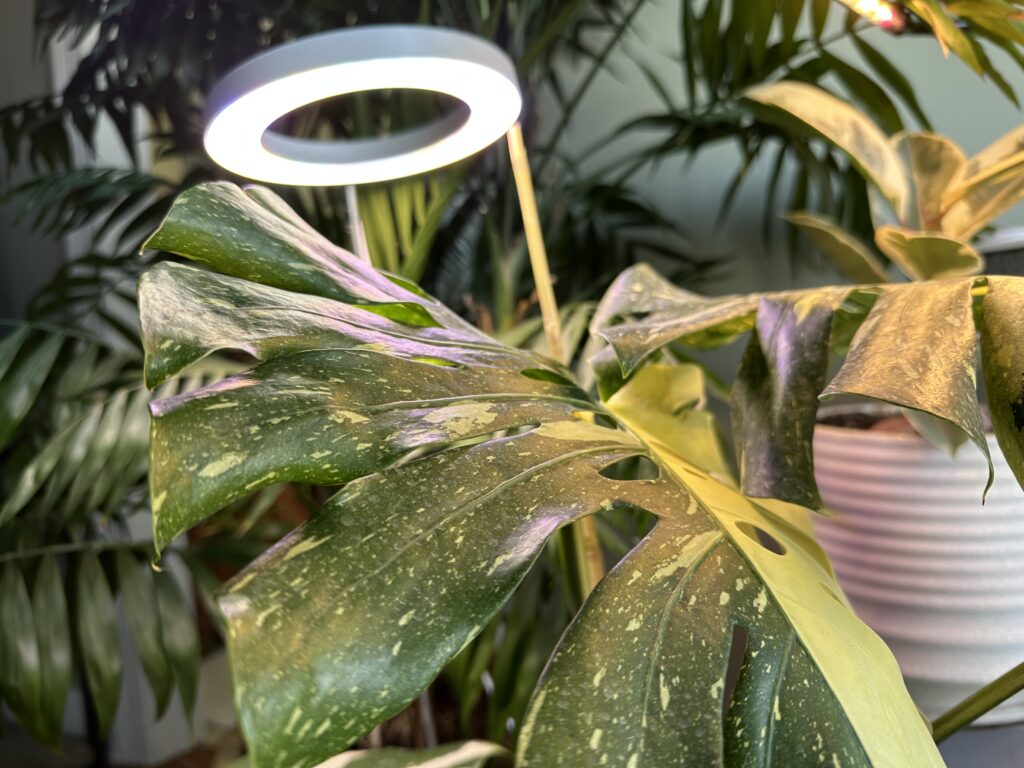
If your houseplant is starved for natural light, it’s time to bring in the artificial reinforcements. LED grow lights or fluorescent lights designed for plants can provide the necessary light spectrum for photosynthesis. Hang them a few inches above your plant, like a celestial disco ball, and let them shine for up to 12 hours a day, mimicking the rhythm of a natural day-night cycle.
This is especially helpful if you live in an environment with cold and dark winters that aren’t conducive to helping indoor plants grow indoors with natural light alone. In fact, with artificial lighting, as well as a humidifier to combat winter dryness, you can convince your plant that your environment is the warm, bright and humid summer growth season all year round. Artificial lighting can not only rescue a dying houseplant kept too long in the dark, but it can unleash so much growth potential during otherwise dormant winter months.
Keep a watchful eye and tweak as needed
After making these adjustments, become a vigilant guardian, watching over your plant’s progress. Patience is key, as it may take time for your plant to bounce back. If you witness positive changes, like new growth or healthier leaves, rejoice in your success. However, if your plant continues to wither away, it’s time to reassess the lighting conditions and make further adjustments.
Remember, each plant has its own unique light requirements, like a diva with specific demands. Research the needs of your particular plant species to ensure you’re meeting its every desire. By finding the perfect balance of light and making the necessary adjustments, you can breathe new life into your dying houseplant and give it a fighting chance at recovery.
Optimizing Humidity Levels: Creating a Plant-Friendly Environment
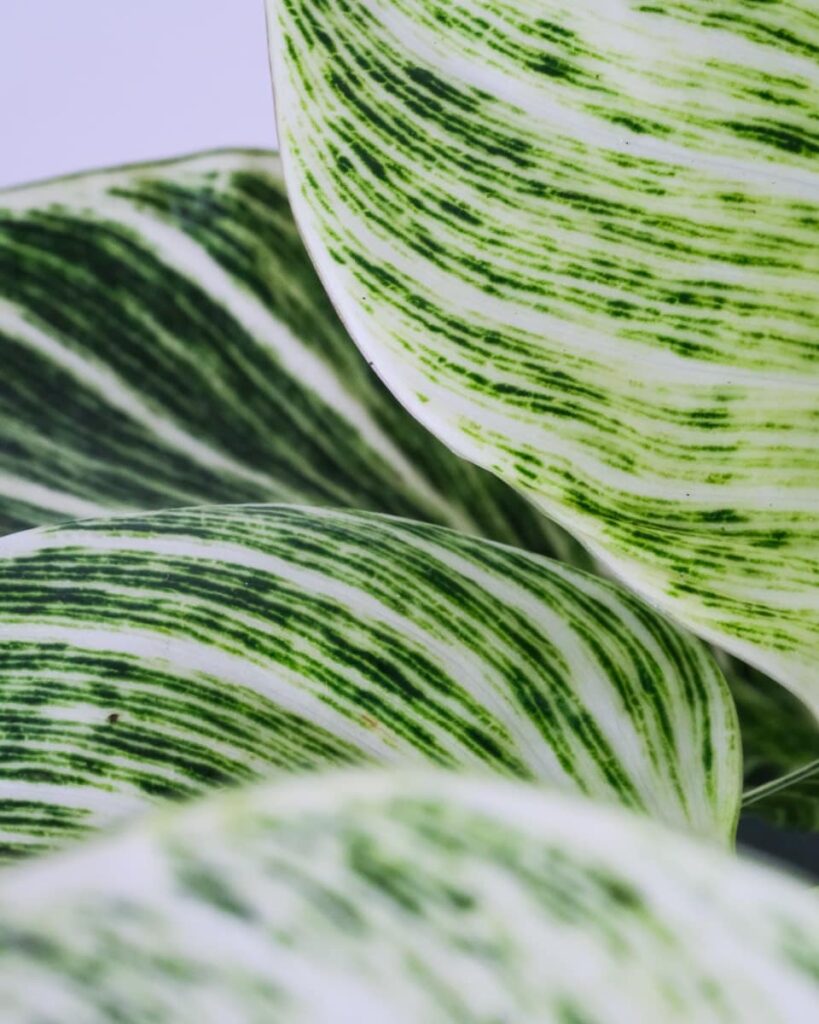
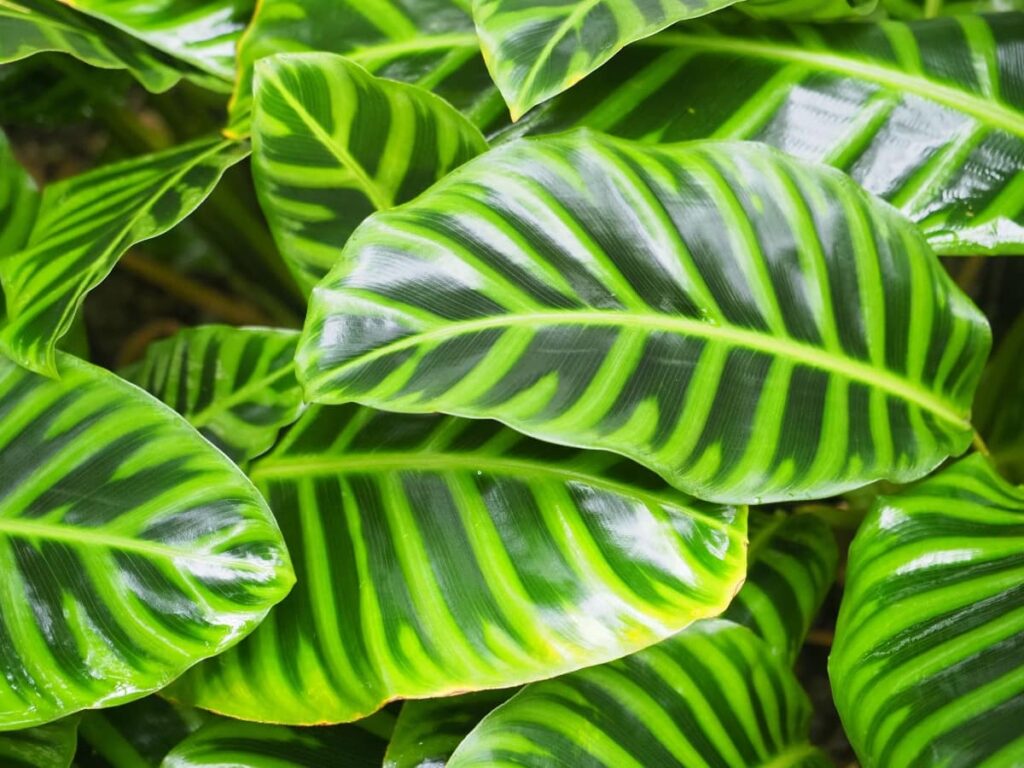
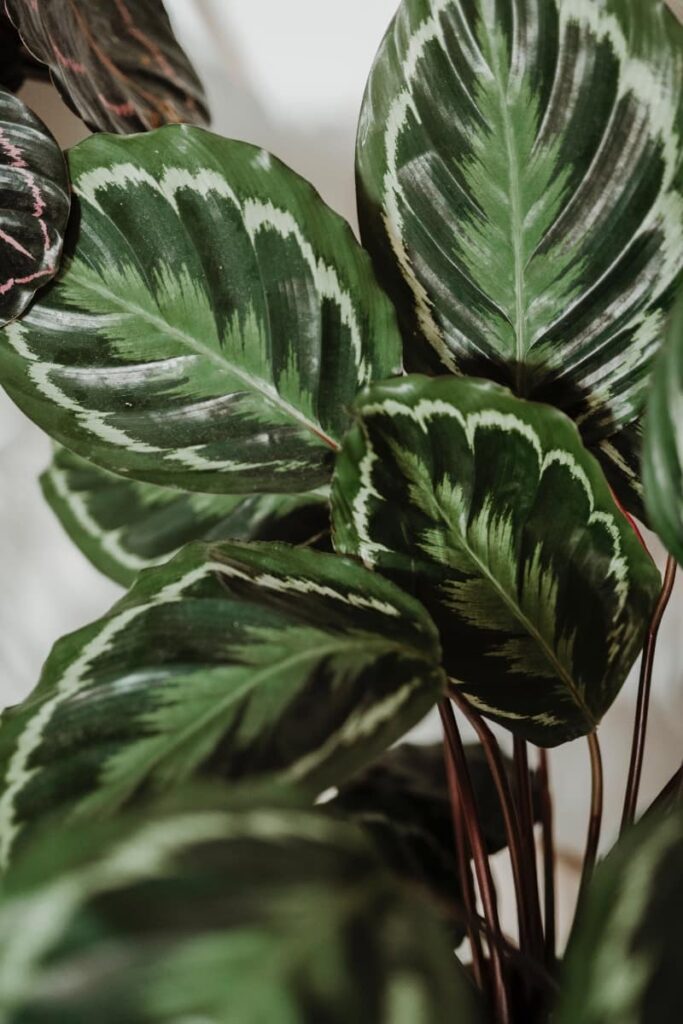
Creating an environment that is conducive to the well-being of a dying houseplant involves optimizing humidity levels. This is a crucial factor as many indoor plants originate from tropical regions where humidity is abundant. Replicating these conditions can have a profound impact on the health and vitality of your struggling plant. Here, we present some effective methods to optimize humidity levels and create an environment that fosters the growth of your houseplant. If you have ever struggled with Calathea Pinstripes, prayer plants, ferns, or other tropicals that showed curling or wilting leaves, humidity was likely the main issue, and number one factor in rescuing your dying houseplant.
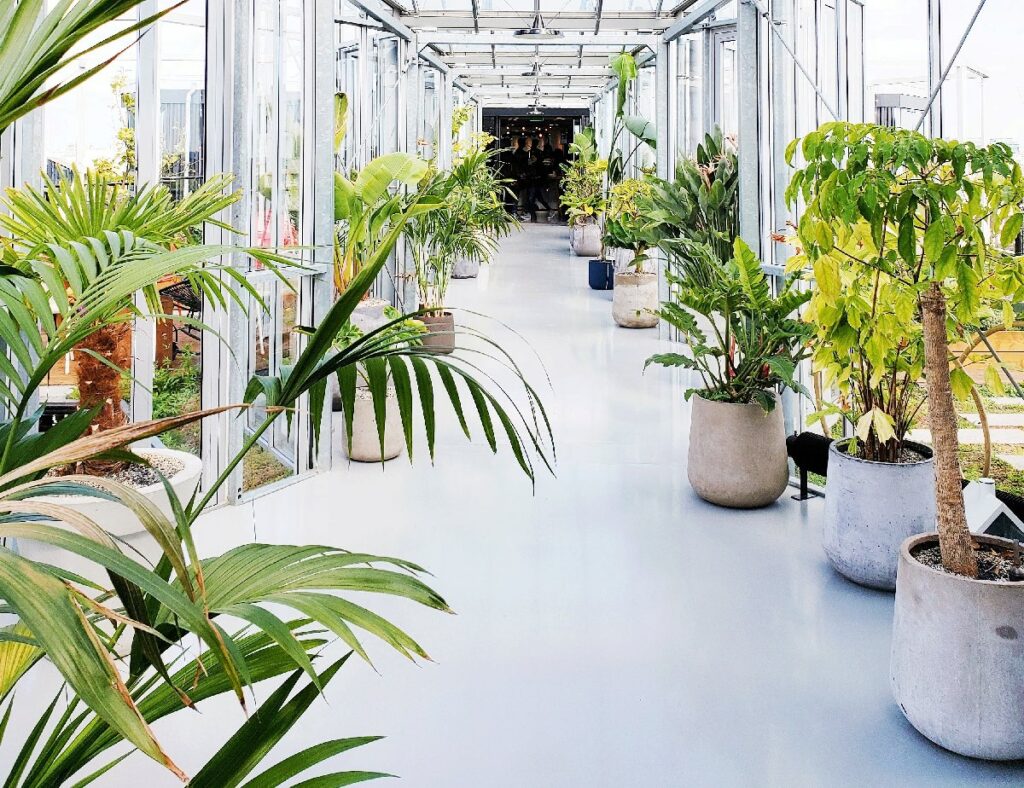
Grouping plants together
A simple yet effective technique is to group your plants together. This creates a microclimate that is characterized by increased humidity. As plants release moisture through transpiration, the surrounding air becomes more humid. By placing your struggling houseplant alongside other healthy plants, you can create a mini-humid zone that benefits all the plants involved. This not only enhances the overall humidity but also promotes a sense of camaraderie among your green companions.
Pebble tray
Another ingenious method to increase humidity around your houseplant is by utilizing a pebble tray. This involves filling a shallow tray with water and placing pebbles or stones in it. Then, position your plant on top of the pebbles, ensuring that the water level is below the pot’s base. As the water evaporates, it will gradually increase the humidity around the plant, providing a more favorable environment. This technique not only serves a practical purpose but also adds an aesthetic touch to your plant’s surroundings.
Misting
Engaging in the act of misting your houseplant’s leaves regularly can significantly contribute to increasing humidity levels. This involves filling a spray bottle with room temperature water and gently misting the leaves, ensuring to cover both the upper and lower surfaces. However, it is important to exercise caution and avoid misting plants with hairy or fuzzy leaves, as excessive moisture can lead to the development of fungal diseases. Misting is particularly beneficial during dry winter months when indoor humidity tends to drop, providing a refreshing and invigorating experience for your plant.
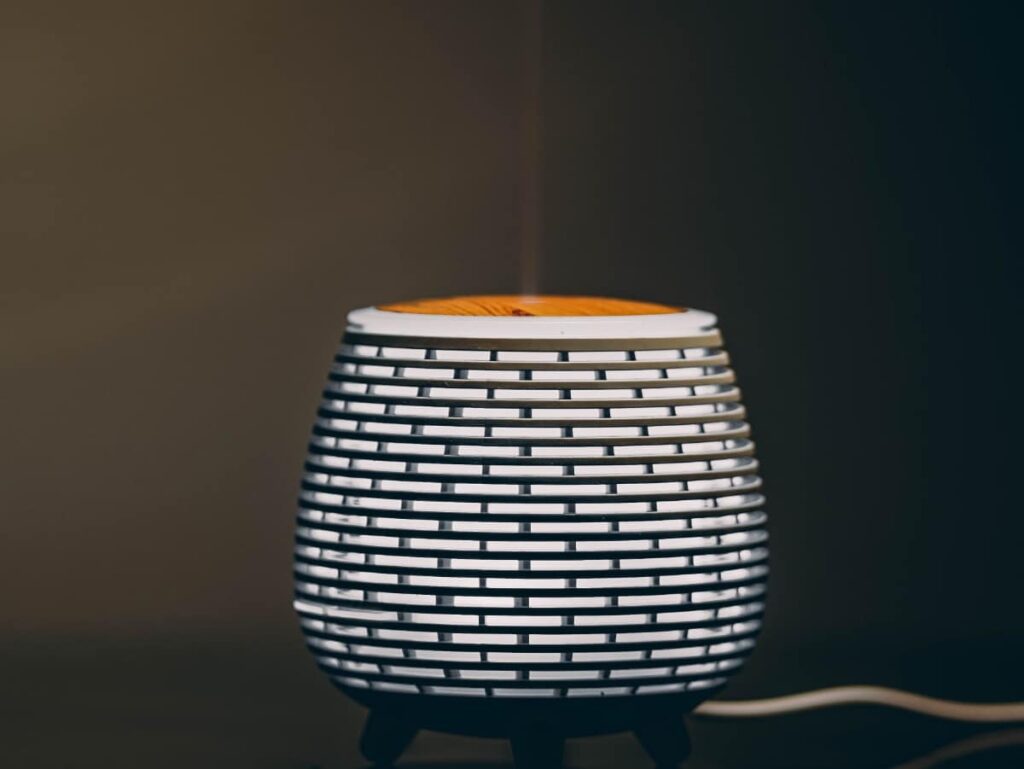
Humidifier
For those who have multiple houseplants or struggle to maintain adequate humidity levels, investing in a humidifier can prove to be a game-changer. Humidifiers release moisture into the air, creating a consistently humid environment for your plants to thrive in. Set the humidifier near your struggling houseplant, ensuring it operates at an appropriate level to avoid excessive moisture accumulation. This modern marvel of technology ensures that your plant receives the optimal amount of humidity, leaving you with peace of mind and a flourishing green companion.
Bathroom or kitchen placement
Bathrooms and kitchens are often havens of higher humidity levels due to regular water usage. Placing your struggling houseplant in these areas can provide a naturally humid environment that mimics its tropical origins. However, it is crucial to strike a balance and ensure that the plant still receives adequate light and is not exposed to extreme temperature fluctuations. This strategic placement allows your plant to bask in the moisture-rich atmosphere, creating a harmonious and nurturing space.
Avoid drafty areas
Drafts can be detrimental to the well-being of your houseplant as they can quickly dry out the foliage, leading to further stress and decline. It is imperative to keep your struggling plant away from drafty windows, doors, or vents. Cold drafts, in particular, can be especially harmful to tropical plants, so it is essential to find a warm and draft-free location for them to thrive in. By shielding your plant from these unwanted gusts of air, you are providing it with a safe and secure environment to flourish.
While optimizing humidity levels is of utmost importance, it is equally crucial to strike a balance. Excessive humidity can give rise to issues such as root rot and fungal diseases, which can further harm your struggling plant. It is essential to regularly monitor your plant’s moisture needs and adjust humidity-enhancing techniques accordingly. By maintaining this delicate equilibrium, you are ensuring the long-term health and survival of your beloved houseplant.
By creating a plant-friendly environment with optimal humidity levels, you can significantly improve the chances of rescuing your dying houseplant. Implement these strategies with care and observe your plant’s response, making adjustments as needed. With patience, dedication, and the right environmental conditions, your struggling houseplant can make a remarkable recovery and once again thrive in all its verdant glory.
Nutrient Deficiencies and Fertilization: Restoring Vitality to Rescue a Dying Houseplant
In the realm of houseplants, a common culprit behind their withering and decline is none other than nutrient deficiencies. Just like humans, these green beauties require a well-balanced diet to flourish and maintain their vibrant vitality. When essential nutrients are lacking, it’s a recipe for disaster, resulting in stunted growth, leaves turning yellow, and an overall state of poor health. But fret not, for with proper identification and timely intervention, you can come to the rescue of your dying houseplant by replenishing its nutrient levels.
The Quest for Identifying Nutrient Deficiencies:
To embark on the journey of effectively addressing nutrient deficiencies, it is of utmost importance to identify the specific nutrients that your houseplant is lacking. Brace yourself, for the most common deficiencies include nitrogen, phosphorus, potassium, iron, magnesium, and calcium. Each nutrient deficiency manifests in its own unique way, making it a tad easier to pinpoint the root of the problem.
Nitrogen deficiency, for instance, often reveals itself through the presence of pale or yellowing leaves, accompanied by stunted growth and stems that are as weak as a newborn kitten. Phosphorus deficiency, on the other hand, may cause leaves to don a dark green hue with purple veins, while flowering takes its sweet time and root development is nothing short of lackluster. As for potassium deficiency, it can lead to leaf edges that are either yellowing or browning, stems that are as weak as a soggy noodle, and a reduced resistance to pests and diseases. Iron deficiency, in its own peculiar way, typically results in leaves that are yellow with green veins, while magnesium deficiency causes a yellowing phenomenon that occurs between the leaf veins. Last, calcium deficiency may cause new growth to take on a distorted or deformed appearance, as if it were a Picasso painting gone wrong.
The Art of Restoring Nutrient Levels:
Once you have successfully embarked on the quest of identifying the nutrient deficiency, it’s time to unleash your inner hero and restore your plant’s vitality by providing the necessary nutrients. Fear not, for the most effective way to accomplish this feat is through the art of fertilization. However, it is of utmost importance to choose the right fertilizer and apply it with the precision of a surgeon to avoid any further damage.
Selecting the Right Fertilizer
Ah, the world of fertilizers, a realm filled with liquid, granular, and slow-release options. Each holds its own unique advantages, so it’s time to channel your inner Sherlock Holmes and choose the one that best suits your plant’s needs and your personal preferences. Seek out a balanced fertilizer, one that possesses an NPK ratio (nitrogen, phosphorus, potassium) that is perfectly tailored to your plant species. And if you’re feeling extra adventurous, consider opting for a fertilizer that contains micronutrients like iron, magnesium, and calcium to address those pesky specific deficiencies.
Applying Fertilizer Correctly
Before you embark on the grand adventure of applying fertilizer, it is of utmost importance to ensure that the soil is moist, but not drowning in a sea of water. Take a moment to peruse the instructions on the fertilizer packaging, for they hold the key to the correct dosage and frequency. Beware, for over-fertilizing can be detrimental to your beloved plants, so it’s crucial to avoid going overboard with your application. If you find yourself in possession of a liquid fertilizer, dilute it according to the instructions and apply it directly to the soil, as if you were bestowing a precious gift upon the earth. As for granular or slow-release fertilizers, sprinkle them evenly around the base of the plant, making sure to avoid any direct contact with the leaves, for they deserve to remain untouched by the fertilizer’s embrace.
Monitoring and Adjusting
Ah, the waiting game begins. After the grand act of fertilization, it is of utmost importance to closely monitor your plant’s response. Patience, dear friend, for it may take a few weeks before you witness the glorious improvements. If, however, the symptoms persist or dare to worsen, it’s time to reevaluate the nutrient deficiency and adjust your fertilization routine accordingly. Sometimes, a second application may be necessary, but always remember to follow the recommended dosage, for we must prevent the dreaded fertilizer burn from rearing its ugly head. Ensure that your houseplant basks in the warm embrace of adequate sunlight, receives proper watering, and resides in an environment that is nothing short of suitable to support its overall well-being. Regularly inspect your plant for signs of pests or diseases, for they too can contribute to the dreaded nutrient deficiencies. By addressing these deficiencies head-on and providing the necessary tender loving care, you shall breathe
Repotting and Soil Rejuvenation: Giving Your Plant a Fresh Start

Your plant’s container can last for years, but keeping it as your houseplant’s forever home will ultimately lead to compacted roots and decline. Luckily, to rescue a dying houseplant in this situation is simple: it’s time for a new pot! As time passes, the soil in your plant’s pot undergoes a transformation, morphing into a compacted, nutrient-depleted wasteland. To make matters worse, drainage issues may rear their ugly heads. But fear not, for there is hope! By granting your plant a fresh start in a brand-new pot filled with revitalized soil, you can dramatically enhance its chances of survival and growth. Brace yourself, for I shall now reveal the secrets of repotting and rejuvenating the soil for your struggling houseplant:
Assess the Need for Repotting
Before embarking on this daring journey, it is imperative to evaluate whether your plant truly requires repotting. Seek out the signs that indicate a dire need for intervention. Keep a keen eye out for roots sprouting from the drainage holes, growth that has been stunted, or a plant that has become top-heavy and teetering on the edge of instability. If any of these signs manifest themselves, it is time to take action.
Choose the Right Pot
The selection of an appropriate pot is a decision of utmost importance, as it holds the key to your plant’s well-being. Exercise caution and ensure that the new pot possesses the vital feature of drainage holes, for they shall prevent the dreaded waterlogging phenomenon. Excess moisture can lead to the dreaded root rot, a fate no plant should suffer. Additionally, opt for a pot that boasts a size slightly larger than its predecessor, granting ample room for the plant’s roots to stretch and grow.
Prepare the New Pot
Before the grand transfer takes place, it is essential to prepare the new pot for its noble purpose. Lay down a foundation of fresh, well-draining potting mix at the bottom of the vessel. This act shall provide a solid and healthy base for your plant’s roots to flourish.
Gently Remove the Plant
With the utmost care and tenderness, extract the plant from its current pot, ensuring that no harm befalls its precious roots. Should the roots find themselves tightly wound or compacted, employ the gentle touch of your fingers or the prongs of a fork to loosen them, encouraging a healthy and vibrant growth.
Inspect and Prune
As the repotting process unfolds, seize the opportunity to inspect the plant’s roots for any signs of rot or disease. Should such afflictions be discovered, do not hesitate to wield your clean and sharp pruning shears, severing any damaged or deceased roots. This act shall pave the way for new root growth and halt the spread of potential issues. For most plants, it’s also safe to trim back the roots to encourage healthy new growth.
A good guide is to never prune back more than 30% of the total root mass to balance keeping the plant’s root system active while encouraging new, healthy growth. New, powerful roots in a larger pot with with fresh soil can help rescue a dying houseplant experiencing root rot – especially for older, more established houseplants.
Rejuvenate the Soil
To breathe new life into the soil, concoct a mixture of fresh potting mix and organic matter, such as compost or well-rotted manure. This magical blend shall replenish the soil’s nutrient reserves and enhance its structure. Beware the siren call of garden soil, for it may harbor pests or diseases that could wreak havoc upon your beloved plant.
Repot and Water
The time has come to reunite your plant with its new abode. Nestle it within the new pot, ensuring that it rests at the same depth as before. Fill the remaining space with the rejuvenated soil, employing gentle pressure to eliminate any lurking air pockets. Quench the plant’s thirst with a thorough watering, allowing the excess liquid to gracefully exit the pot through the drainage holes.
Provide Adequate Care
Following the grand repotting spectacle, it is of utmost importance to find a suitable location for your plant, one that caters to its unique light and temperature requirements. Shield it from the harsh glare of direct sunlight and shield it from the whims of extreme temperature fluctuations. Keep a watchful eye on the moisture levels of the soil, watering your plant when the top inch of soil feels as dry as the desert sands.
By embarking on the noble quest of repotting and rejuvenating the soil, you bestow upon your struggling houseplant the gift of a fresh start. This transformative process not only grants the plant access to vital nutrients but also bolsters its root health and overall vitality. With the proper care and unwavering attention, your rescued houseplant shall rise from the ashes, flourishing once more and adorning your home with its resplendent beauty.
Pruning and Trimming: Encouraging New Growth
Pruning, a masterful act, not only eradicates lifeless or diseased segments of the plant but also serves as a catalyst for rejuvenation, ultimately enhancing the overall health of the botanical marvel. Scrutinize each nook and cranny, seeking out the telltale signs of decay and affliction. Be on the lookout for leaves tinged with yellow, spots of brown, or stems that have withered away. These are the areas that demand immediate attention.
Assemble the arsenal of transformation
To rescue a dying houseplant, gather the necessary tools that will aid you in your quest for revival. Arm yourself with razor-sharp pruning shears or scissors, a pristine cloth or tissue, and the mighty elixir of rubbing alcohol. Remember, cleanliness and sharpness are the keys to thwarting the spread of malevolent diseases.
Bid farewell to the lifeless and the afflicted
Commence your pruning odyssey by severing the ties with any lifeless or yellowing leaves, for they are unlikely to experience a miraculous resurrection. Trim them with precision, ensuring a clean cut just above a leaf node or bud, intimately connected to the main stem or branch. Should you stumble upon any stems or branches plagued by disease, summon your courage and slice them back to the realm of health, leaving no trace of the affliction behind.
Unleash the potential for rebirth
To awaken the dormant potential for new growth, direct your attention towards the leggy or overgrown stems that have lost their luster. Seek out the barren patches or the distorted contours that mar the plant’s splendor. With a deft hand, trim these wayward stems back to a thriving node or bud, employing a slight angle to your incision. This act of precision will ignite a symphony of new shoots and branches, a testament to the plant’s resilience.
Embrace the allure of equilibrium
Amidst the pruning frenzy, strive to maintain a harmonious equilibrium for your beloved houseplant. Prune away any excessively elongated or unruly branches, paving the way for a more compact and aesthetically pleasing visage. Pause intermittently, stepping back to admire the plant’s overall shape as you navigate the labyrinth of pruning.
Purify and disinfect
After each decisive cut, embark on a cleansing ritual, purifying your pruning tools with a pristine cloth or tissue drenched in the elixir of rubbing alcohol. This sacred act serves as a shield, warding off the malevolent forces of disease that seek to infiltrate other plants. Furthermore, should you encounter any sap or residue clinging to the plant’s surface, gently eradicate it with the tender touch of a damp cloth.
Nurture with tender care
Once the pruning ritual reaches its crescendo, bestow upon your houseplant the tender care it craves, nurturing its recovery and fostering the emergence of new life. Ensure that it basks in the warm embrace of ample sunlight, quenches its thirst with the elixir of water, and feasts upon the nourishing banquet of nutrients. Consider the gift of a balanced fertilizer, a veritable feast for the plant’s voracious appetite, fueling its journey towards robust growth.
Remember, the art of pruning and trimming demands a delicate touch and a judicious hand. Beware the perils of excessive pruning, for it can inflict undue stress upon the plant, impeding its path to recovery. Vigilantly monitor the progress of your houseplant, adjusting your pruning routine with the wisdom of a seasoned horticulturist. Armed with the knowledge of proper pruning techniques, you possess the power to resurrect a fading houseplant, breathing life into its weary existence and ushering forth a vibrant tapestry of new growth.
Dealing with Pests and Diseases: Safeguarding Your Plant’s Health
Dealing with pests and diseases can be quite the challenge. These unwelcome intruders can wreak havoc on your beloved plants, causing all sorts of trouble like wilting, yellowing leaves, stunted growth, and even death if left unchecked. But fret not! With a proactive approach and timely intervention, you can rescue your dying houseplant from the clutches of these pesky pests and diseases. Brace yourself as we dive into some effective strategies to safeguard your plant’s health!
Identify the Problem
Let’s start by unraveling the mystery. The first step in combating these sneaky pests and diseases is to accurately identify the issue at hand. Get up close and personal with your plant, giving it a thorough inspection. Pay close attention to every nook and cranny, from the leaves to the stems and even the soil. Keep an eye out for signs of trouble like tiny insects, webs, or sticky residue that may indicate a pest infestation. And don’t forget to watch out for any discoloration, spots, or unusual growth patterns that might be a telltale sign of a disease. The key here is to identify the problem correctly so you can choose the most appropriate treatment.
Isolate the Plant
When trouble strikes, it’s time to take action! If you spot any pests or diseases on your houseplant, it is crucial to isolate it from the rest of your healthy plants immediately. Think of it as putting the infected plant in quarantine. This prevents the infestation or infection from spreading like wildfire and wreaking havoc on your entire plant collection. So, find a separate room or area to house the affected plant until you can resolve the issue.
Natural Remedies
Let’s explore the wonders of nature! Before resorting to harsh chemical treatments, why not give natural remedies a shot? Mother Nature has some tricks up her sleeve that can help you combat these pesky intruders. For instance, a mixture of mild soap and water can work wonders in washing away aphids, spider mites, and other tiny insects. And have you heard of neem oil? It’s a natural insecticide that packs a punch against a wide range of pests. If that’s not enough, you can even introduce some beneficial insects like ladybugs or predatory mites to help control those pesky pest populations. Nature truly has its own army!
Chemical Treatments
When all else fails, it’s time to bring out the big guns! If the infestation or disease persists despite your best efforts with natural remedies, you may need to resort to chemical treatments. But hold your horses! Before you go spraying pesticides left and right, exercise caution. These chemicals can do more harm than good if not used correctly. Always, and I mean always, follow the instructions provided by the manufacturer. And if possible, opt for organic or plant-safe products to minimize any potential harm to beneficial insects or your precious plant.
Improve Cultural Conditions
Prevention is better than cure, they say! And it holds true for your plants too. A healthy plant is more resistant to pests and diseases, so let’s give them the best possible environment to thrive. Ensure your houseplant gets its fair share of sunlight, water, and proper humidity levels. Remember, moderation is key! Avoid overwatering, as it can create a cozy environment for fungal diseases to thrive. Keep those leaves clean and dust-free to avoid attracting any unwanted guests. And don’t forget about proper ventilation! Stagnant air can lead to fungal infections, so let the breeze flow and keep your plants happy.
Quarantine New Plants
Ah, the excitement of adding new plants to your collection! But hold on, don’t let your enthusiasm get the best of you. When introducing new plants, it’s essential to play it safe. Quarantine them for a few weeks before integrating them with your existing plants. Think of it as a probation period. Keep the new plant in a separate area and keep a close eye on it for any signs of trouble. This way, you can nip any potential pests or diseases in the bud before they have a chance to wreak havoc on your entire collection.
By taking a proactive approach and implementing these strategies, you can effectively safeguard your plant’s health and rescue it from the clutches of those pesky pests and diseases. Remember, early detection and timely intervention are the keys to saving your dying houseplant and restoring it to its former glory. So gear up, arm yourself with knowledge, and let’s protect those precious plants together!
Patience and Monitoring: Tracking Progress and Adjusting Care
Rescuing a dying houseplant is no easy task. It requires a delicate balance of patience and diligent monitoring. You must keep a close eye on your plant’s progress and be ready to make necessary adjustments to its care regimen. Begin by closely observing your plant’s condition. Take note of every minute change you notice. Document its appearance, from the color and texture of its leaves to its overall vitality. Pay attention to any signs of improvement or deterioration, such as new growth, wilting, or discoloration. Don’t forget to snap pictures regularly to compare its progress over time. This meticulous observation will give you valuable insights into your plant’s journey to recovery.
2. Monitoring the moisture level of the soil is crucial. Stick your finger about an inch deep into the soil to assess its moisture content. If it feels dry, it’s time to water your plant. However, be cautious not to overwater, as consistently wet or soggy soil can lead to root rot. Adjust your watering schedule accordingly, finding the perfect balance to quench your plant’s thirst.
3. Light conditions play a vital role in your plant’s well-being. Evaluate the amount and quality of light it receives. Inadequate light can result in weak growth and pale leaves, while excessive light can scorch the foliage. If your plant appears leggy or lacks vitality, consider relocating it to a spot with more or less light, depending on its specific light requirements. Finding the perfect lighting conditions will give your plant the energy it needs to thrive.
4. Temperature and humidity are factors that should not be overlooked. Each houseplant has its own preferences when it comes to these environmental conditions. Extreme temperature fluctuations or excessively dry air can stress your plant, making it more susceptible to diseases and pests. Keep a close eye on the temperature and humidity levels in the vicinity of your plant using a thermometer and hygrometer. This way, you can ensure that your plant is in a comfortable environment that matches its needs.
5. As your plant’s condition changes, adjust your watering and fertilizing routine accordingly. If you notice healthy new growth, it may be a sign that you need to increase the frequency or amount of water and fertilizer. On the other hand, if your plant’s condition worsens, consider reducing watering and fertilizing until it stabilizes. Finding the right balance in nourishing your plant will provide it with the necessary nutrients for recovery.
6. Regularly inspect your plant for any dead or dying parts. These can attract pests or diseases and divert energy from healthy growth. Take out your trusty pruning shears and remove these lifeless parts with precision. By doing so, you’ll not only eliminate potential threats but also redirect your plant’s resources to healthier areas, promoting overall growth and vitality.
7. Patience is key throughout this entire process. Rescuing a dying houseplant is not an overnight miracle. It takes time, sometimes weeks or even months, for your plant to fully recover. Avoid making drastic changes to its care routine too quickly, as this can cause additional stress. Instead, be patient and allow your plant the time it needs to respond to the adjustments you make. Remember, slow and steady wins the race when it comes to reviving your beloved green companion.
By practicing patience and closely monitoring your plant’s progress, you can make informed decisions about adjusting its care to not just save a dying houseplant, but ensure it’s healthy for years to come. Keep in mind that each plant is unique, and what works for one may not work for another. Embrace the journey, give your dying houseplant the attention it deserves, and with a little trial and error, you can provide it with a fighting chance at a healthy and vibrant future.
Preventive Measures: Maintaining a Healthy Houseplant
Maintaining the health and vitality of your beloved houseplants is of utmost importance in order to prevent them from succumbing to a state of decline. By incorporating a handful of uncomplicated preventive measures into your routine, you can guarantee that your plants remain exuberant and resilient. Here, we present to you a comprehensive list of key steps to ensure the well-being of your cherished houseplant:
Adequate Lighting
The provision of an appropriate amount of luminosity is absolutely pivotal for the overall welfare of your houseplant. It is imperative to comprehend the specific light requirements of your individual plant, as different plants necessitate varying degrees of illumination. For those plants that thrive in the sun’s warm embrace, it is advisable to position them in close proximity to windows that receive copious amounts of bright, indirect sunlight. Conversely, shade-loving plants should be strategically placed away from the direct glare of the sun’s rays. To ensure equal distribution of light exposure, it is highly recommended to periodically rotate your plants.
Proper Watering
The act of overwatering or underwatering is a common pitfall that can inflict harm upon your cherished houseplants. But if caught in time, it’s incredibly easy to rescue a dying houseplant due to a watering issue. Each plant boasts its own unique watering needs, thus it is of paramount importance to conduct thorough research and gain a comprehensive understanding of the specific requirements of your plant species.
As a general rule of thumb, it is preferable to err on the side of underwatering rather than overwatering, as most houseplants tend to thrive in slightly arid conditions. Prior to embarking on a watering spree, it is advisable to assess the moisture level of the soil by inserting your finger approximately one inch deep. If the soil feels parched, it is an indication that it is time to administer water. To ensure proper drainage, it is advisable to employ pots that possess drainage holes and to refrain from allowing your plants to languish in stagnant water.
Humidity Control
Numerous houseplants flourish in environments that boast elevated levels of humidity. In order to maintain an adequate level of humidity, it is recommended to regularly mist your plants or to position a tray filled with water in close proximity to them. The act of clustering plants together can also engender a microclimate that is characterized by heightened humidity. However, it is crucial to exercise caution and refrain from overindulging in this practice, as excessive moisture can pave the way for the onset of fungal diseases. Humidifiers are an easy way to rescue a dying houseplant due to a lack of humidity, with the added benefit of making homes more beneficial to people as well.
Appropriate Temperature
Houseplants generally exhibit a preference for temperatures that mirror those that are deemed comfortable for humans, typically ranging between 60-75°F (15-24°C). It is advisable to shield your plants from extreme fluctuations in temperature, such as drafts emanating from open windows or heating vents. During the winter season, it is prudent to keep your plants at a safe distance from cold drafts, while during the summer months, it is imperative to shield them from excessive heat.
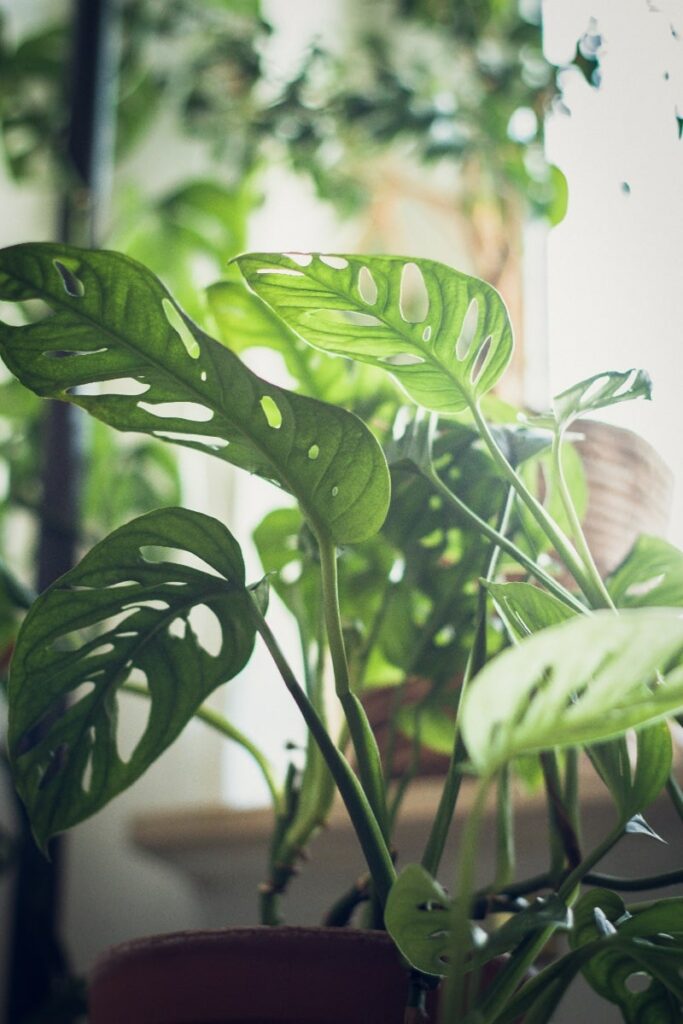
It is possible to rescue a dying houseplant left outdoors during a sudden drop in temperature if the plant isn’t exposed to extremely cold temperatures for too long. I’ve seen Monsteras ensure near-freezing temperatures for days to nearly completely rebound. Simply move any plants inside as soon as possible, and hold off on watering until you start to see your plant’s conditions improve.
Regular Fertilization
The provision of essential nutrients to your houseplants is an indispensable component of their growth and overall well-being. It is recommended to employ a balanced, water-soluble fertilizer that has been specifically formulated for houseplants. In order to avoid the perils of over-fertilization, which can inflict damage upon your plants, it is crucial to adhere to the instructions that are outlined on the packaging. Fertilization should be carried out during the active growing season of your plants, which typically spans the spring and summer months. Conversely, it is advisable to reduce or cease fertilization during the dormant period.
Dusting and Cleaning
The accumulation of dust upon the leaves of your houseplants can impede their ability to engage in the process of photosynthesis and to respire. It is highly recommended to regularly cleanse the leaves by employing a damp cloth or by subjecting them to a gentle shower, thereby facilitating the removal of dust and ensuring that the foliage remains immaculate. This practice will also serve as a deterrent against pest infestations.
By incorporating these preventive measures into your routine, you can create an environment that is conducive to the health and well-being of your houseplants. It is crucial to remain vigilant and to closely monitor your plants, as they may exhibit signs of distress or necessitate specific adjustments in terms of care. With the application of proper attention and care, you can not only rescue a dying houseplant that experienced neglect, but you can ensure your plant’s long-term health and vitality.
Final Thoughts
When it comes to rescue a dying houseplant, there are additional tips and considerations that you should keep in mind. Patience is key when it comes to reviving a dying houseplant. It’s not a quick fix, so don’t expect immediate results. It may take weeks, or even months, for the plant to fully recover. Stay committed and continue providing the necessary care, even if you don’t see instant improvement.
1. Pay attention to your plant’s appearance. There really is no perfect schedule for watering, sunlight or other care needs. Each home and environment is different, so looking at the visible signs of your plant is the best way to identifying its needs. Rescuing a dying plant starts with an understanding of it’s care needs, identifying any issues, and making changes to address them directly.
2. Overwatering is a big no-no. While it’s important to water a dying plant, you must avoid overdoing it. Overwatering can lead to root rot and cause further damage. Always check the soil’s moisture level before watering and ensure proper drainage to prevent waterlogging. Finding the right balance is crucial.
3. Keep an eye on humidity levels. Many houseplants thrive in environments with higher humidity. If your dying plant prefers a humid climate, you can consider using a humidifier or placing a tray of water near the plant to increase moisture in the air. Alternatively, misting the leaves occasionally can also help. It’s all about creating the perfect atmosphere for your plant to flourish.
4. Pruning and trimming are essential. If your dying houseplant has dead or yellowing leaves, it’s crucial to remove them. Pruning not only improves the plant’s appearance but also redirects its energy towards healthier growth. Remember to use clean and sharp pruning shears to avoid causing any further damage.
5. Fertilize wisely, my friend. While fertilizers can provide essential nutrients to a dying plant, it’s important to use them judiciously. Over-fertilizing can do more harm than good. Choose a balanced, water-soluble fertilizer and follow the instructions carefully. Generally, it’s best to fertilize during the growing season and reduce or stop fertilization during the dormant period. Don’t go overboard with the nutrients!
6. Repotting might be necessary. If your dying houseplant is root-bound or suffering from poor soil quality, it’s time to consider repotting. Choose a pot that is slightly larger than the current one, use fresh potting soil, and ensure proper drainage. Gently loosen the roots before placing the plant in its new home. Give it a fresh start!
7. When all else fails, seek professional advice. Don’t hesitate to reach out to a professional if your efforts to revive your dying houseplant are in vain. Local nurseries, garden centers, or horticulturists can provide expert advice and guidance tailored to your specific plant’s needs. Sometimes, a fresh perspective is all you need.
To rescue a dying houseplant requires dedication, patience, and a willingness to adapt your care routine. By providing the right conditions, addressing any underlying issues, and giving your plant the attention it needs, you can increase its chances of recovery and enjoy a thriving, healthy houseplant once again. Keep nurturing and watch it bloom!
Frequently Asked Questions
Why is my houseplant dying?
There can be several reasons why your houseplant is dying. It could be due to overwatering or underwatering, lack of sunlight, improper temperature or humidity levels, pests or diseases, nutrient deficiencies, or even root-bound conditions. Identifying the specific issue will help you take appropriate steps to rescue your dying plant.
How can I tell if my houseplant is underwatered or overwatered?
Underwatered plants often have dry soil, wilted leaves, and may appear weak or droopy. Overwatered plants, on the other hand, may have yellowing leaves, root rot, or a foul odor. Additionally, the soil may be constantly wet or waterlogged. Checking the moisture level of the soil and observing the plant’s overall appearance will help you determine if it needs more or less water.
What should I do if my houseplant has root rot?
If your houseplant has root rot, it is crucial to act promptly. Carefully remove the plant from its pot and gently wash away the soil from the roots. Trim off any mushy or blackened roots using clean and sterilized pruning shears. Repot the plant in fresh, well-draining soil, ensuring the pot has proper drainage holes. Avoid overwatering and monitor the plant closely for signs of recovery.
How can I rescue a houseplant with yellowing leaves?
Yellowing leaves can indicate various issues, such as nutrient deficiencies, overwatering, or lack of sunlight. Start by assessing the plant’s care routine and make necessary adjustments. Ensure the plant is receiving adequate sunlight, water it appropriately, and consider using a balanced fertilizer to address any nutrient deficiencies. Trimming off severely damaged or yellowed leaves can also help redirect the plant’s energy towards healthier growth. By addressing these issues, you can easily rescue a dying houseplant with yellowing leaves.
What can I do if my houseplant is infested with pests?
If your houseplant is plagued by pests like aphids, mealybugs, or spider mites, there are several steps you can take. Begin by isolating the affected plant to prevent the infestation from spreading. Use a gentle insecticidal soap or neem oil solution to treat the pests, following the instructions on the product. Regularly inspect the plant and repeat the treatment if necessary. Additionally, maintaining good plant hygiene and regularly cleaning the leaves can help prevent future infestations.
Can I rescue a severely wilted dying houseplant?
While it may be challenging, there is still hope for a severely wilted houseplant. Start by thoroughly watering the plant and ensuring it receives adequate sunlight. If the soil is dry, you can also try placing the pot in a tray of water for a short period to allow the roots to absorb moisture. Trim off any severely damaged or wilted leaves and monitor the plant closely. With proper care and patience, the plant may recover and regain its vitality.